About Meg
-
Are you a caterer? How can I order a board?
I am a food stylist, content creator and blogger. No, I do not sell boards.
I share my boards to teach and inspire you to make beautiful spreads of your own. On my blog and insta, you’ll find all sorts of tips and tricks to make pretty platters, for any occasion.
While I don’t sell my boards, I highly recommend the Sorella Collective here in LA (where I live). If you have recommendations on buying lovely boards in other areas, send me your recommendations (email me at [email protected]) and I’ll share them in a post!
-
How did you get started?
My mom was a caterer, so I grew up knowing the art of food presentation from a young age. I often helped her prep and serve for her parties, and learned lots of tips along the way.
Because I love to entertain and I’m not necessarily the biggest cook, cheese boards have long been my go-to for guests. Everyone loves a cheese board and the beautiful display is often a distraction from the fact that I haven’t turned my oven on in years.
Before doing this cheese boarding full time, I worked for an ad agency for years. It felt really gutsy to change careers and do this as my primary job, but it’s my life passion and I just couldn’t pass up the opportunity to jump into it fully with all of myself. I believe it’s never too late…
My goal now is to provide the best industry tips and tricks for you to create beautiful boards of your own. More than that, I want to help you elevate the way you entertain and inspire you to get creative in the kitchen. Nothing brings me greater joy than seeing how that inspiration translates into your boards. Oftentimes it inspires me right back.
-
Who eats all your boards?
I get this question a lot and it totally depends.⠀⠀
First and foremost, board making has become my job. As a food blogger, I make them all the time for posts, holiday content, and even brand partnerships. So while this started as me snapping a few photos of boards I made for friends, it quickly transformed into something I do daily (even when they aren’t around for a party).
At this point, leftovers are saved and shared with neighbors, family, friends, or really any hungry people I come across. Some of it gets thrown away, but I reuse the cheese in tricked out quesadillas or omelets and lots of the produce in weeknight dinner salads. PSA: If you aren’t putting grapes in your salads, you’re missing out big time!
Tips for Building Beautiful Boards
-
Do you offer workshops?
Yes! Before COVID, I did them in person, but right now, I have a few virtual offerings, which you can read about on my Workshop Page.
-
How many people will this board serve?
This is the question I get asked the most. I wish there was a simple answer, but for cheese plates it’s dependent on a few factors:
Who’s coming over? (my girlfriends tend to eat less than a co-ed party)
Are there other snacks being served?
Is this just an appetizer? (with a meal being served after) Or is this the main course responsible for filling people up?
The general rule:
If you’re serving the cheese as an appetizer, plan on 1- 2oz of each cheese per person. (FYI, 1oz of cheese is equivalent to a pair of dice.) If it’s your main course for grazing, about 3oz per cheese per person should be good. Honestly, I’ve known groups to eat way more than that. Plus, who really knows what an ounce of cheese looks like, or wants to do that math?!?I don’t know that even the most seasoned caterers can predict the exact amount that people will eat. It’s all an educated guess. But as you start to serve cheese plates, you’ll begin to learn how much your guests like through trial and error.
I should note that my approach is always to overbuy. You can refill the board if it’s looking scrappy and people are still hungry. And, in my opinion, leftover cheese in the house is never a bad thing. Use it up with this Omelet Board or Quesadilla Board.⠀⠀⠀⠀⠀⠀⠀⠀⠀
I have made boards for one and two (check out that post for tips on how to make smaller boards). But I’ve also made boards for a 200 person gathering (where plenty of other food was being served).
It’s worth it to say that if you are only having a few folks over, and you want to make a large spread but without wasting too much food, you can always add food items as decoration to make it look festive. I love adding gourds to Fall boards. They take up a nice amount of space and look beautiful too. You can do this with whole pomegranates, clementines, and apples for display.
-
I’ve never made a board before. Where do I get started?
You’ve come to the right gal. I love helping people get their board on! My biggest hope is that you see a board I make and it inspires you to make something beautiful.
I have boards for every occasion (12 board sections on my blog for you to explore). Popular categories include:
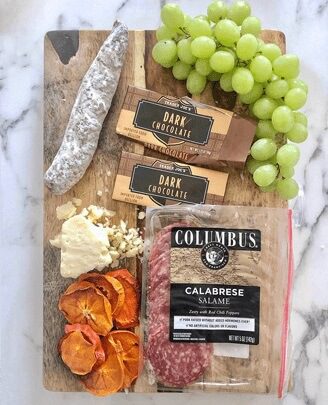
If you’re just starting out, I suggest using this Trader Joe’s one-stop shopping list and creating a board like my $65 Budget Trader Joe’s Board or the $35 Budget Trader Joe’s Board. Even if you don’t have a Trader Joe’s nearby, you can find comparable items at other grocery stores.
Having the right tools will also help make cheese boarding easier. Check out my Shop Page for all my recommendations, including my Cheese Boarding Starter Kit with the essentials to begin your boarding journey.
-
What should I serve my charcuterie on?
In terms of boards and serving equipment, you should check out my cheese board starter kit and this list of favorite round boards and favorite rectangle boards. These are great places to begin—don’t worry, there’s only a few items you really need to start, you don’t need to break the bank to make your first cheese board.
I mean, you could use a sheet tray if you really wanted before getting any boards—it’s been done! I have accumulated so many boards, bowls, ramekins, and accessories over time, so don’t feel like you need it all immediately! Bookmark my shop page and collect items over time.
-
How do you arrange food to make it look so beautiful?
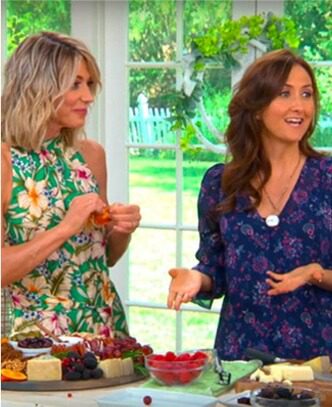
If you want tips on how to arrange the food on your board I have a few basic suggestions in a video I did with Home & Family. It has some of my best secrets to building a cheese board that will really wow your guests.
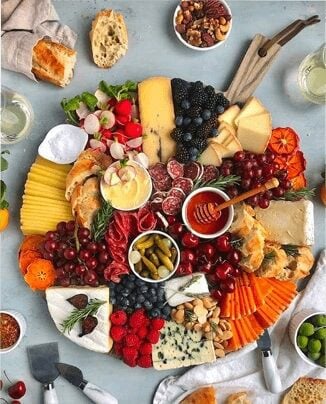
The most honest advice I can give if you’re starting out is to replicate images of boards that you really like. Then just keep trying different things until you find your style. For example, I place all of my items close together, but some people like to space them out a bit. See this post of the differences between these two styles. There’s really no wrong way.
Ultimately I share what works for me to help inspire you to make beautiful boards. What I want is for you to enjoy the process and the end result. Have fun with it, this is all about your enjoyment. I’ll tell you the rules so that you can break them!
-
What is the best way to transport boards?
Great question! No one wants to make a beautiful board only to have it all start falling off the edges before you get to your party to serve it. I have a great post about it here.
First I place a few long layered sheets of aluminum foil under my board before I build it. Check it out in my stories here. It’s much easier to wrap the foil up over the board when it’s done than to lift and wrestle with a heavy board.
Fold all of the pieces of foil up over the edge of the board, ensuring that all sides are accounted for and the top is completely covered. Add an extra piece on top if your top edges don’t meet.
If you are packing up a board that you won’t eat for a few hours, you can try placing any items that need refrigeration in a cooler and then placing them on your board when you arrive. You can also refrigerate the board to help keep it all cool (just be aware that crackers and nuts can be compromised after extended time in the fridge).
Placing the board in my car I often try to find a shallow box that is just bigger than the edges of the board. If you have a place in your car that is already fairly flat, you likely don’t need this, but I find it’s helpful so that if I make any sharp turns or sudden stops.
I highly recommend getting a board with a lip around the edge to help avoid spills (even if you are just transporting from the kitchen to the living room). If you’ve been around here for a while, you know I love this rectangular board with a lip and this smaller circular one with a lip.
Trays are also great. Just make sure they are food safe vs. just for decoration. See question “How do you know if a board is “food safe?” for tips on this.
-
Can I make a board a day in advance?
I do not recommend making boards a day in advance. I totally understand why you would want to, but your board won’t look as nice and your food definitely won’t taste as good, trust me.
If you put crackers next to anything that has moisture, they will get soggy and weird. Nuts are the same story. Berries will stain your cheese and anything briney or juicy will just leak onto the other items.
I CAN help give you some tips to prep your items a day in advance though:
Get Organized: I like to put all the items I’m going to use together so that I know I have all the things I’ll need. Mostly this includes the dry goods, crackers, nuts, dried fruit, basically anything that’s not refrigerated.
Produce: Wash and thoroughly dry fruit. I don’t recommend slicing fruit like apples, pears, or persimmons any time before you need it, because they will go bad. But if you want to cut grape stems into smaller bunches that’s totally okay. I do not wash berries because they can go bad. But PRO TIP, store berries with a paper towel in the clamshell, it will absorb some of the moisture and keep them from molding quickly. I also love these Greensaver Produce Saver containers for keeping my produce (including berries) fresh. Side note: I also swear by stasher bags for most everything (except berries).
Cheese: I don’t often cut cheese a day early, but you totally can. I often preslice hard cheeses for guests so that they don’t have to do it on the board. Any hard cheese you’re going to serve, cut those a day in advance and then store them in your cheese bags. You can also check out how to best slice different types of cheese in my stories. Don’t do anything to the softer cheeses, like brie. Those you should most often be placing on the board whole anyway.
Board Supplies
-
What are your favorite tools?
My shop page has a curated list of my favorite boards, kitchen tools, specialty foods and candies, plus lots of other accessories I like to use with an explanation for why I love them. If you’re overwhelmed, begin with the items on the cheese board starter kit.
When picking out items for your boarding collection, think about versatility and other times you can use these items. I use ramekins for lots of other things other than boards (serving nuts, baking souffles, or simply just eating yogurt out of them—the sky’s the limit).
Choose classic looking pieces that will last you longer than just one season (I usually stick with white porcelain and wood items). From there, you can expand into seasonal items (like fun shaped-ramekins) when you’re ready.
In terms of cheese board utensils, like cheese knives and tongs, I’m a big fan of laying them out around the board to lead your guests (seen in this cheese board here). It’s also a great idea to cut a few pieces of the cheese before your guests arrive so no one’s too intimidated to start diving-in.
Note that if you see an instagram post and are wondering where I got the items in the photo, you can always head over to the shop my instagram feed here and find links for them items used.
-
Where do you get your boards?
My cheese boarding starter kit has two of my favorite boards. If you’re just starting out, I would recommend those (i.e. this wood tray with a lip or this round wood tray). Beyond those, here’s a more comprehensive list of my favorite round boards and my favorite rectangle boards.
My go-to places to get boards are:
Crate & Barrel, they have a great balance of classic and modern kitchen and home goods.Sur la Table, a classic place to get beautiful and functional items for your kitchen. I really like their ramekins and small tools—the added bonus is they always have the same items in stock, so if you break something you can easily replace it.
Amazon, of course, you can get anything there (and super quick), I find stylish things that are relatively affordable. Top recommendations on my Shop Page.
Note that if you see an instagram post and are wondering where I got the items in the photo, you can always head over to the shop my instagram feed here and find links for them items used.
-
How do I take care of my wood boards?
Great question! Wood Boards are my favorite, but many of them need very special care to ensure they serve you for a long time. I did a comprehensive guide to all the best ways to clean and store your boards.
Specific care instructions are especially important for wood boards for food safety reasons. Wood absorbs more than metal, marble, or other elements, and if not properly washed and oiled (here’s my favorite mineral oil), food residue can rot inside your board. Ew!
-
How do I get stains out of my wood board?
This is also covered on my post on How to Care for Your Wood Boards.
-
How do you know if a board is “food safe?"
The confusion around this only usually only comes up if you find a wood tray. Most other wood boards are pretty clearly food safe.
You will be able to determine this by a few factors:
In what section of the stores is the board being sold? If it’s by other cutting boards and food boards, it’s likely fine. If it’s being sold in an area showcasing decor, it might not be. The place this can be most confusing is in a Home Goods type store because they sometimes put them together. Target, for instance, is usually clear cut: in-store the decorative ones will be in a section with candles and pillows; on their website, they have both a section called “decorative trays and platters” and one called “serving trays.”
Check the back of the board for writing or a sticker that says “food safe” or “for decorative purposes only.”
Check the description on the product’s website—it will often say there. Or, oftentimes, users may ask the question in a comments section on a website. See the description and Q&A for this gorgeous wood serving board from Target confirming it’s food safe.
Ingredients
-
How do you store your cheese?
Great question! Please avoid using ziplocks, saran wrap, or tinfoil to store your cheese. Use special cheese paper or cheese bags to keep it fresher, longer. I only use Formaticum cheese bags, they let the cheese breathe, while preventing moisture from escaping.
-
Where do you get the flowers for your boards?
Flowers are a beautiful addition to any cheese board. When sourcing them, make sure they’re sold as “edible”—not because you’re necessarily going to eat them, but so they’re food safe.
Regular, store-bought flowers often have chemicals and pesticides on them, which is not advised next to food you consume.Camomile and lavender are popular choices for boards. They are small which is nice so that they don’t crowd the food, but they’re also very fragrant and beautiful (and we all know we eat with our eyes and nose before we even taste our food!).
If any of your guests ask if they can eat the flowers (technically yes, since you bought edible ones) you might warn them that both chamomile and lavender are very bitter. You wouldn’t want your guest to ruin their palate for the day, just because they’re curious.
Check out this adorable post using edible flowers from Melissa’s Produce.
Where I buy edible flowers:
My local farmers market (I always ask the vendor if they are food safe).
Whole Foods often has some by the herb section.
Certain CSA boxes might have an option to add them.
Gourmet Sweet Botanicals out of San Diego, CA has a great selection and ships.
-
Do you really use the honey on your boards? How are you supposed to use it?
Yes! Honey is the perfect sweet compliment to many cheeses.
Which cheeses, you say? Glad you asked! I put together a four-part explainer of cheese board ingredients that pair particularly well with honey, more specifically my favorite honey brand: Bees Seasonal Honey. Beyond that, here are some helpful links:
Have you ever had toasted sourdough, Manchego, pistachios and honey? It’s a must try!
I also love honey with cheddar, especially a nice sharp, aged cheddar (like in this Perfect Cheese Pairings post).
Creamy, mild cheeses pair really well with sweeter flavors, like more tropical honey.
You really can’t go wrong. Pairings are personal and I encourage you to experiment with different combinations to find your favorites.
To use honey on a board I always serve it with my favorite honey dipper! It’s the best way to drizzle honey on your next bite.
How do you use a honey dipper? You want to roll the dipper in the bowl of honey, make sure it’s completely coated. Holding the dipper at an angle, lift it out of the honey and keep rolling it until the drip is at its smallest (or not dripping at all). Then quickly move the dipper over your food, it will start a slow drip—just keep rolling the dipper until you have the desired amount on your plate.
-
Where are the crackers? How come there aren’t that many crackers on your board?
Duh, I don’t eat crackers. JUST KIDDING. Of course I eat crackers. But I don’t put a lot of them on the actual boards.
Why? I’m such a stickler for color and style, and crackers are often beige and a bit boring looking. But they are obviously an essential component of any spread (the vessel for which the delicious cheeses often make their way to your mouth!), so mine are usually hiding out on a platter on the side.
I recommend placing a few crackers on the board and then adding a platter or shallow basket on the side with the rest. You can line up crackers so they look pretty and garnish them with some rosemary to be a little extra.
Currently, these Rustic Bakery Sourdough Flatbread Crackers and these Pistachio, Rosemary and Apricot Crisps are my favorite crackers.
-
What are your favorite Trader Joe’s products?
I’ve got a Trader Joe’s one-stop-shopping list of items that I love to put on my boards. I also refined that list to make my Trader Joe’s $65 budget board and $35 budget board (which are both great for varying budgets).
These posts walk you through the common cheeses and accoutrement that I often use. You’ll find everything you need in one store, and if you don’t have access to a Trader Joe’s, these items are easily swapped out for similar items you’d find in your go-to grocery store.
-
What are your favorite Aldi products?
I love this quality grocery store for budget finds. They have a great meat and cheese selection and offer a variety of additional board staples (from crackers to nuts).
Here is My Aldi Charcuterie Board Under $50.
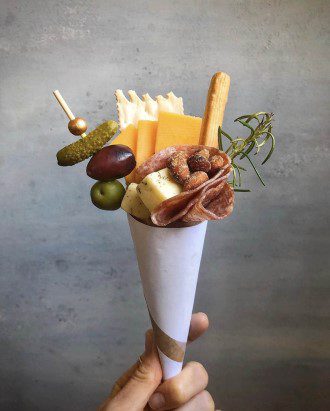
My favorite ALDI finds can be also be found on this Rosé Bouquet post. This puts them to use in one of my handheld cheese servings, but you can also take those product recommendations and use them to make a larger board.
Photography Tips
-
What kind of camera do you use?
I always use my iPhone for my posts. Phone cameras (no matter the type) are all fairly sophisticated these days; you don’t need to invest in any expensive equipment to get started. Honestly if you are looking to start posting boards and cheese platters, you just need to start somewhere, don’t let buying a fancy camera be an excuse to hold you back.
Occasionally I have used a professional photographer for important posts or special products. You‘ll notice the ones where that’s the case because I always use a photo credit. Using a professional photographer is an added expense but has been a valuable investment for my business as needed.
-
How do you edit your photos?
When editing photos, recently I’ve been using the iPhone app exclusively. I often adjust the brilliance, increase shadows, and enhance the sharpening.
Additionally, Snapseed is great for tougher jobs. It’s not necessarily an intuitive app, but once you get the hang of it, it’s easy. I use it for white balance and specific spot correcting.
-
How to take great food photos?
Lighting: One big rule of thumb when taking food photos is to always use natural light. It gives your food the best, most natural looking colors. Just make sure you’re not in direct light, which causes harsh shadows…Unless that’s your style. It’s certainly become a cool and popular aesthetic these days. However, it doesn’t always allow for each individual ingredient to shine through enough for my tastes.
Composition: I also focus on the composition of my board before even thinking about getting my camera out. For me styling the board is the most important. You can learn more about my styling techniques in the Cheese Board 101 section of this post.
Styling: Sometimes I like to take photos of the board alone, but more often I’ll place items in the corner of my shot (wine glasses, napkins, extra ramekin with crackers) just to give the board a bit more of a story—some ambiance.
-
What kind of photo equipment do you recommend?
As I mentioned above, an iphone is great for taking food photos and all you need when starting out. Beyond that, here are a few items that take my photos and videos to the next level:
A tripod for shooting steady time-lapse videos. Be sure to get a square jellyfish tripod mount to allow for your phone to connect to the tripod.
This ring light has been especially helpful when I run out of good daylight while shooting. I use it mostly for videos of me speaking to camera or doing demos. Also note that this tripod (with ring light detached) could be a nice alternative to the one above.
Backdrops for photo shoots. Photo backdrops from Bessie Bakes (available on Amazon) have been a game changer for me. I love the yellow marble backdrop and this grey stone photo backdrop. Previously, I used to shoot on my kitchen table directly, but would end up with reflections and shadows. The backdrops allow you to put them at the height you prefer. In fact, I used this adjustable table to shoot my boards.
